The ACF (Advanced Custom Fields) is a very popular plugin among the WordPress community. This tutorial will cover dynamically populate a select field’s choices in ACF, for example, ACF is not providing any way to add user roles dropdown or any other controls which you can use in WordPress. So we will populate the existing dropdown with our dynamic choices. Let’s just jump into it.
Where To Add Code Snippet in WordPress
Most Important: Add the following code to your child theme’s functions.php file. If you add custom code directly to your parent theme’s functions.php file then it will be wiped entirely when you update the theme.
If you are using a custom theme and if it doesn’t require any update then you can directly place the code into wp-content/themes/your-theme/function.php file.
Please also note that we have tested all codes in the GeneratePress child theme & Storefront child theme.
What Is ACF?
Advanced Custom Fields is a WordPress plugin that allows you to add extra content fields to your WordPress edit screens. These extra content fields are more commonly referred to as Custom Fields and can allow you to build websites faster and educate your client’s quicker.
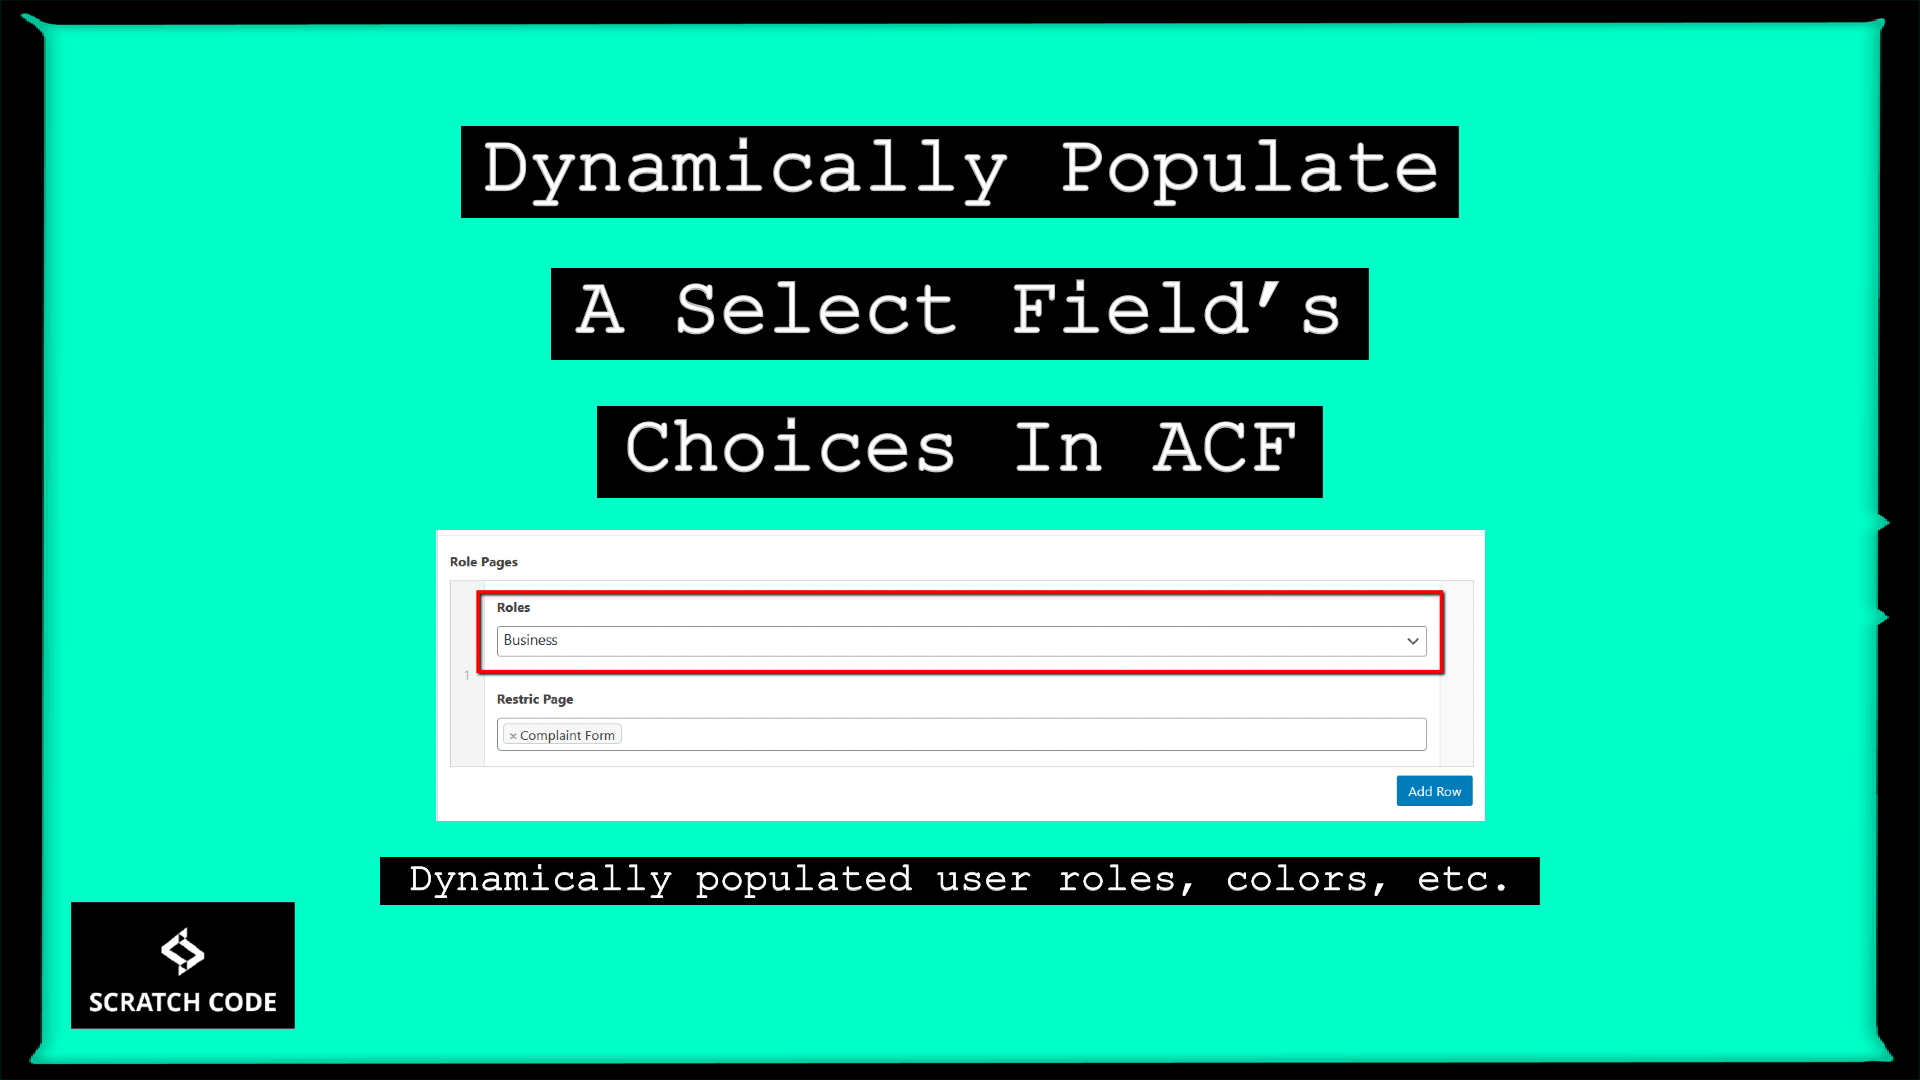
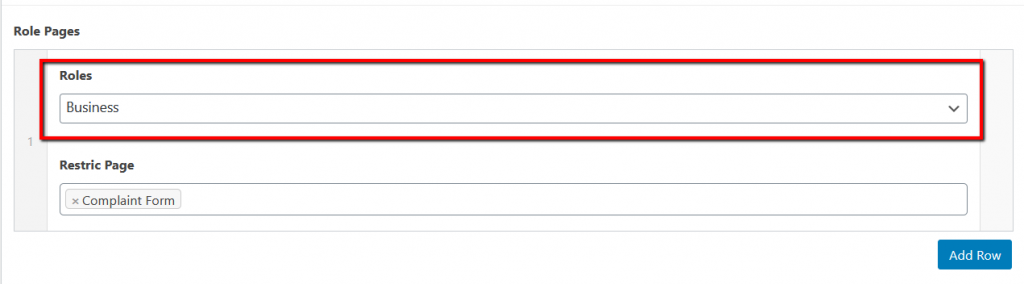
01 Add User Roles Dropdown In ACF In WordPress Backend
In this example, we will load a select field with user roles. The select field in this example has a name of “user_roles”.
ACF provides a "acf/load_field" filter hook which helps us to dynamically change the choices as we want based on your ACF field name like we are using “user_roles” in this example. Please check the below screenshots for a better understanding.
Add User Roles Field in ACF Look Like:

User Role Selection Will Look Like In WP Backend:
Code Snippet
/*@ Populate acf select which name is "user_roles" with user roles in ADMIN BACKEND*/
if ( !function_exists('populateUserRolesInAcfSelect') ):

	add_filter('acf/load_field/name=user_roles', 'populateUserRolesInAcfSelect');
	function populateUserRolesInAcfSelect( $field ){

		// reset choices
		$field['choices'] = array();

		global $wp_roles;
		$roles = $wp_roles->get_names();

		foreach ($roles as $key => $role) :
			$field['choices'][ $key ] = $role;
		endforeach;

		return $field;
	}

endif;
02 Do You Want To Fill Select Choices Based On Client’s Inputs?
With the same mechanism, we can provide a way to client to build up own ACF select choice. Yes, you are hearing exactly what we are saying. Let’s first see what we want to achieve.
Following Data Will Be Add By The Admin or Client
Admin or Client will insert the data from the following repeater and then this data will be populated into another select which can be used by the normal users for selection or same client or admin can use.

Based Upon Above Inputs Following Select-box Will be Populated
After admin adds the different choices then the normal users can use the following select box for final choices or the same admin or client can use for another purpose.

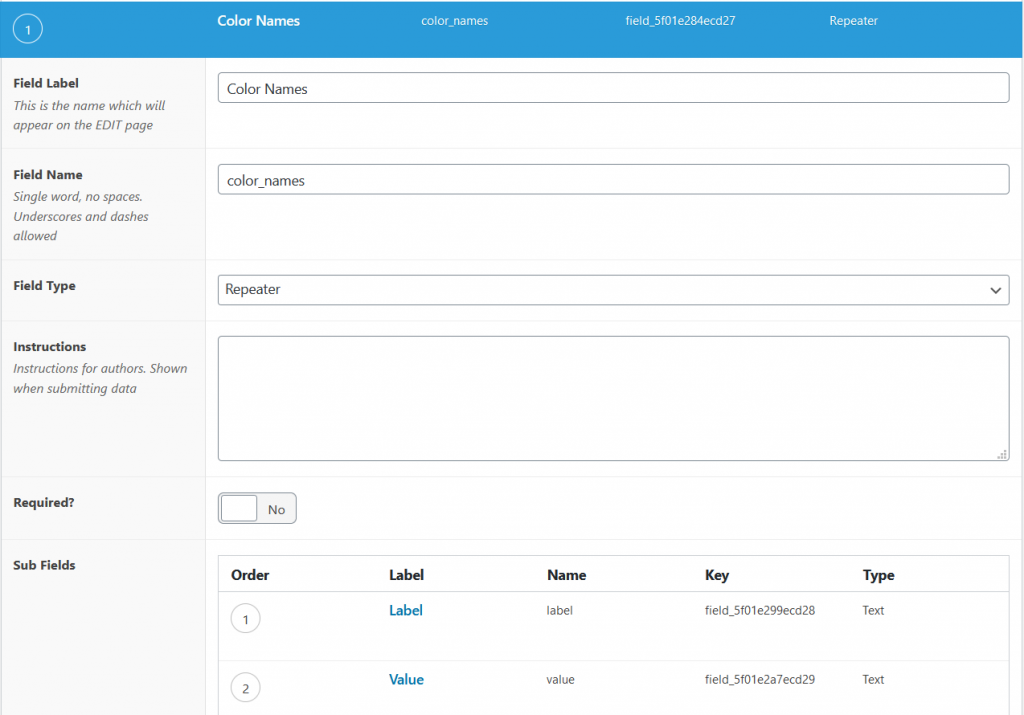
ACF WP Backend For Colors Repeater Look Like:
Color names repeater will look like following in ACF backend:
That’s it from our end. We hope this article helped you to learn to dynamically populate a select field’s choices in ACF.
Additionally, read our guide:
- How to Add Products Per Page Dropdown in WooCommerce
- “Sorry, your session has expired. Return to homepage” – WordPress WooCommerce Error
- How to Create a Plugin in WordPress from Scratch
- How to Disable Admin Bar in WordPress Without Plugin
- How To Send Custom Emails in WordPress
- How to Allow Preview of Draft Post Without Login in WordPress
- Import Users From CSV In WordPress Programmatically
- 403 Error When Updating in Elementor
Please let us know in the comments if everything worked as expected, your issues, or any questions. If you think this article saved your time & money, please do comment, share, like & subscribe. Thank you for reading this post 🙂 Keep Smiling! Happy Coding!