
In this tutorial, we will see how to dynamic the iframe URL in Elementor. Sometimes, we need to dynamic the iframe in the page, post, or custom post type. Let’s just jump into it.
Steps To Make Dynamic Iframe In Elementor
Before diving into the steps, let’s assume that we have a Services custom post type just like posts or page in our WordPress install.
Now, we want to dynamic the iframe in each single service page using Elementor.
- At the very first, we need to add a new custom field into our
Servicescustom post type. You can add it as per your requirement.
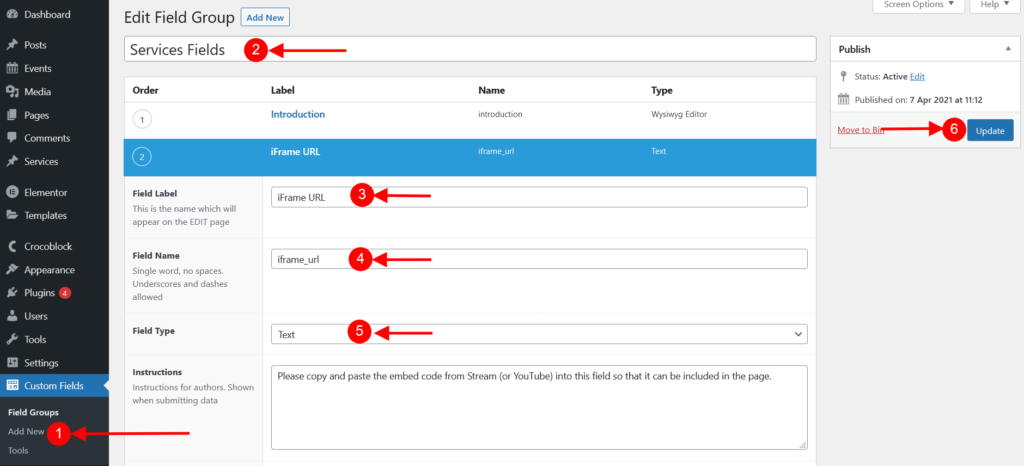
There are different ways to add the custom fields in WordPress but to make it easy, we are using the Advanced Custom Field plugin to create the custom field in WordPress. - First, install the Advanced Custom Field plugin, and to create a new custom field go to the
Custom Fields->Add New - Add custom fields title and then add the new custom field by pressing the
Add Fieldbutton. After that, addField Label(“iFrame URL” in our case) and Choose theField Typeto Text input just like the below screenshots.
- Then assign the created custom fields to the page, post, or custom post type as shown below screenshot. In our case, we need to assign it to the
Servicescustom post type.

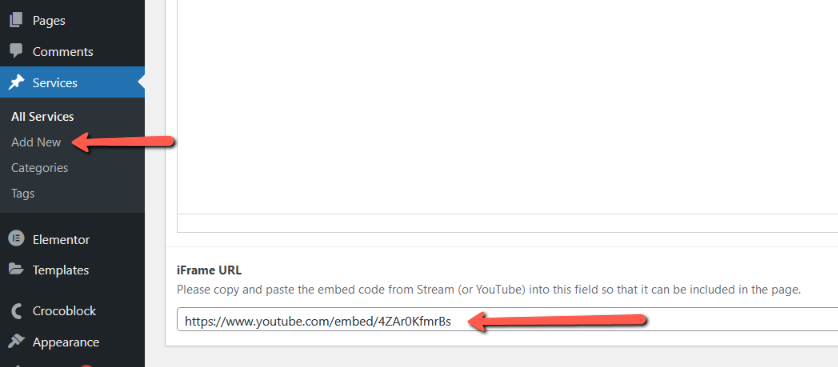
- Let’s add a dummy URL into our newly created field. To do that navigate to the assigned page or post, in our case
Services->Add New or Editand add any URL you want to show as an iFrame then save the post or page.
- Now, go to the Elementor editor on your particular page or Single post template, in our case we need to edit the
Single Servicepage Elementor template. You can create your own byTemplates>Add New
After that drop & drop theText Editorwidget and click onDynamic Tagsand selectACF Fieldoption as shown in the following screenshot.
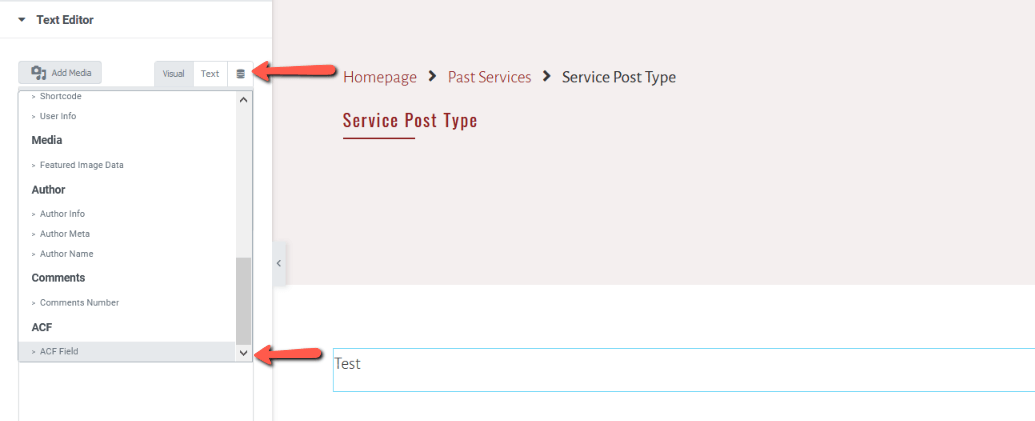
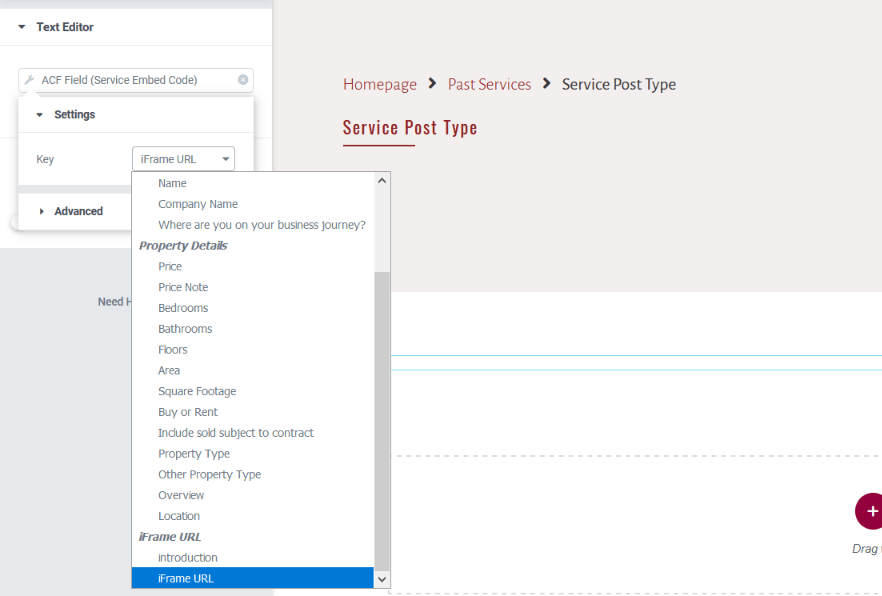
- It will automatically close the select box but click again on it and in
Keyoption select the ACF field that we created in the previous step, in our case we have created theiFrame URLfield so select that as shown in the below screenshot.
- Now, we are very near to end of this tutorial, click on
Advancedaccordion and you will see thebefore,afterandcallbackoption.
We now need to divide our iframe code into two parts. Let’s assume our iframe code looks like below:
<iframe width="900" height="506" src="https://www.youtube.com/embed/9xwazD5SyVg" title="YouTube video player" frameborder="0" allow="accelerometer; autoplay; clipboard-write; encrypted-media; gyroscope; picture-in-picture" allowfullscreen></iframe>
- The first part will be
<iframe width="900" height="506" src="and need to be inserted into thebeforeoption. - And the second part will be (including double quotation)
" title="YouTube video player" frameborder="0" allow="accelerometer; autoplay; clipboard-write; encrypted-media; gyroscope; picture-in-picture" allowfullscreen></iframe>and needs to be inserted into theafteroption.

- This way our URL will be placed between the
beforeandafteroption, thus our iFrame will be completed with the dynamic URL in Elementor.
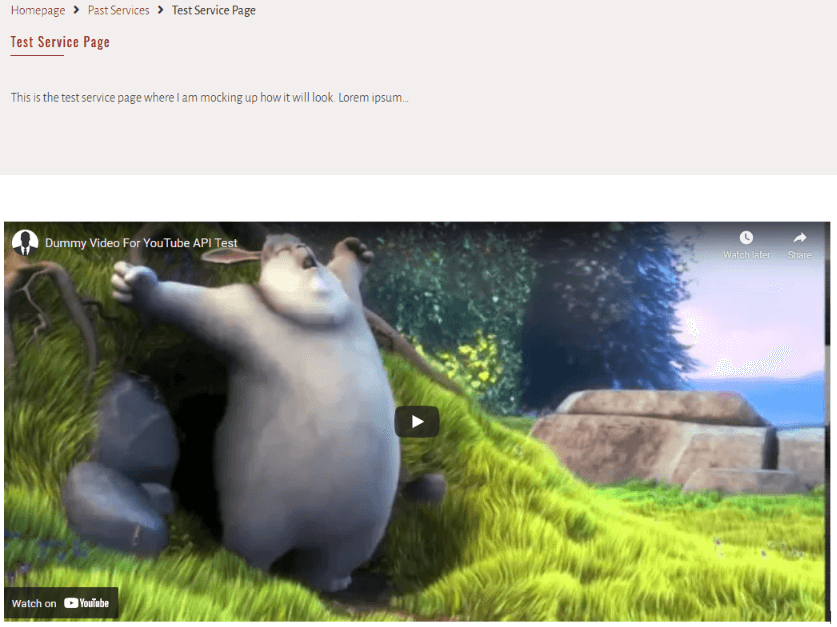
Output:
Additionally, read our guide:
- How To Add Back Button In Elementor
- 403 Error When Updating In Elementor
- How To Add Multiple Post Types In Posts Widget In Elementor
- How to Add Products Per Page Dropdown in WooCommerce
- “Sorry, your session has expired. Return to homepage” – WordPress WooCommerce Error
- How to Create a Plugin in WordPress from Scratch
- How to Disable Admin Bar in WordPress Without Plugin
- How To Send Custom Emails in WordPress
- How to Allow Preview of Draft Post Without Login in WordPress
- Import Users From CSV In WordPress Programmatically
- Dynamically Populate A Select Field’s Choices In ACF
- How To Create Database Table In WordPress
- Difference Of require, include, require_once And include_once
- PHP: Get Day Name From Date
- PHP: Get Year From Date
We hope this article helped you to make a dynamic iframe in Elementor
Please let us know in the comments if everything worked as expected, your issues, or any questions. If you think this article saved your time & money, please do comment, share, like & subscribe. Thank you in advance 🙂. Keep Smiling! Happy Coding!

Hello!
I am building a website for vacation rental management. The content of this article is just what I needed to be able to make the iframe for which the booking calendar is included on the web dynamic. The problem is that I can’t get it to work.
I have done the tutorial several times, even using the example you show and for some reason elementor does not show me the content, it only shows text.
Do you know why this can happen?
Hey beaglezperdigon,
You might be facing some issues with point number 8. You need to add