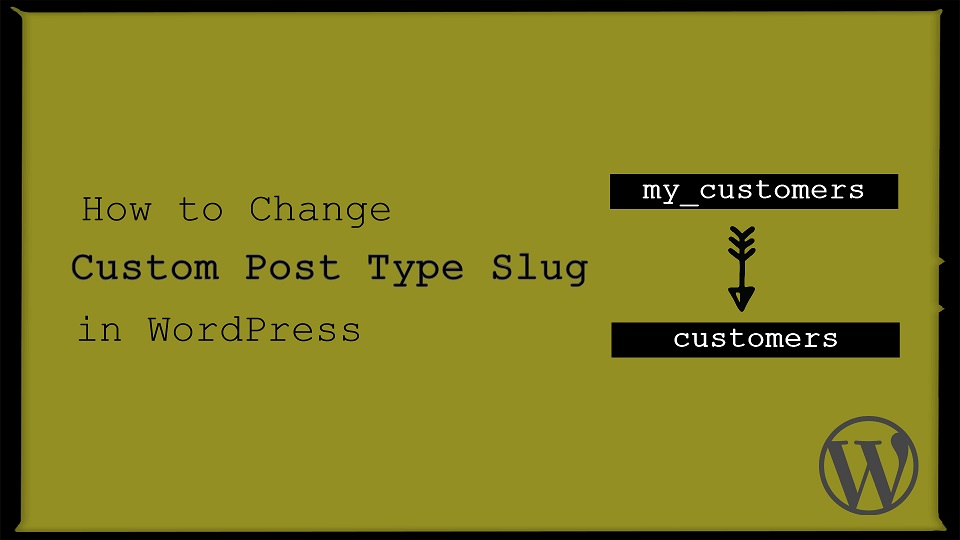
Sometimes, WordPress users want to change custom post type slug instead of the default one. In such a case, we will show you the right and good way to do it with very simple step. So are you ready to do it? Let’s just jump into it.
Considerations Before Changing The Custom Post Type (CPT) Slug
There are some naming conventions for the slug in WordPress. So consider the following points before writing your new slug.
- The new slug should be
uniqueotherwise, it won’t work and led you to the 404 page - For good SEO use only
lowercase letters - White
spacesare not allowed - Use
dashes (-)to separate slug’s words likemy-custom-post-type-slug
An Ideal Place to Add Code in WordPress
Most Important: Add the following code to your child theme’s functions.php file. If you add custom code directly to your parent theme’s functions.php file then it will be wiped entirely when you update the theme.
If you are using a custom theme and if it doesn’t require any update then you can directly place the code into wp-content/themes/your-theme/function.php file.
Please also note that we has tested all codes with the GeneratePress child theme & Storefront child theme.
Steps to Change The Custom Post Type (CPT) Slug
There might be numerous ways to do this. You can do this with or without a plugin. It’s a very simple task, so we don’t recommend using the plugin but if you want to do with plugin then you can.
01 Change Slug of a Plugin’s Custom Post Type (CPT)
To do this, we can use the register_post_type_args filter hook. So by using this hook we can rewrite our custom post type’s slug.
Let’s change the slug by taking a very simple example. Let’s assume, you have a "My Customers" custom post type and its default slug is "my-customer" so now you want to change the slug to "customers". So you can do that by following way.
/*@ Rewriting slug of CPT */

if( !function_exists('sc_change_custom_post_type_slug') ):

	add_filter( 'register_post_type_args', 'sc_change_custom_post_type_slug', 10, 2 );

	function sc_change_custom_post_type_slug( $args, $post_type ) {

	    if ( 'my-customer' === $post_type ) {
	        $args['rewrite']['slug'] = 'customers';
	    }

	    return $args;
	}

endif;
On the above example, we have added a function with a filter hook. Then inside a function, we added if condition to check whether the post type is 'my-customer' or not if it is 'my-customer' then we are changing the slug to 'customers'. That’s it.
Notes: In order to make the above example work, you need to change your current custom post type slug on highlighted line no. 9 and your new slug on line no. 10
Go to Settings -> Permalinks and re-save the permalinks by clicking the “Save Changes” button after modifying the code as this will flush the rewrite rules which are needed to make the changes.
02 If You Have Already Created a Custom Post Type (CPT) Using register_post_type Function
If you have already created a custom post type by using a register_post_type function then, it will be very easy to change the slug. You just need to add one more argument 'rewrite' => array('slug' => 'customers') into the register_post_type.
Let’s see simple example so that you can understand better.
- Let’s assume, you have already created a custom post type by the following code.
function my_customer_post_type_setup() {
    $args = array(
        'public'    => true,
        'label'     => __( 'My Customers', 'textdomain' ),
        'menu_icon' => 'dashicons-book',
    );
    register_post_type( 'my-customers', $args );
}
add_action( 'init', 'my_customer_post_type_setup' );
- Now, add the rewrite argument as below into your
register_post_typefunction.
function my_customer_post_type_setup() {
    $args = array(
        'public'    => true,
        'label'     => __( 'My Customers', 'textdomain' ),
        'menu_icon' => 'dashicons-book',
        'rewrite'   => array( 'slug' => 'customers' ),
    );
    register_post_type( 'my-customers', $args );
}
add_action( 'init', 'my_customer_post_type_setup' );
Go to Settings -> Permalinks and re-save the permalinks by clicking the “Save Changes” button after modifying the code as this will flush the rewrite rules which are needed to make the changes.
03 If You Have Already Created a Custom Post Type Using CPT UI Plugin
Lots of WordPress users are using the Custom Post Type UI plugin for adding custom post types. So sometimes, they might want to change the slug of CPT instead of changing the default “Post Type Slug”.
If user directly change the slug from Basic Settings -> “Post Type Slug” textbox then it will erase all the data. So let’s change the slug in a right way.
- Go to
CPT UI -> Add/Edit Post Typessubmenu - Then click on
Edit Post Typestab - Now,
selectyour post type from the dropdown

- After that scroll down and down to the
"Custom Rewrite Slug"input box - Now, enter your new slug into that textbox like “customers”
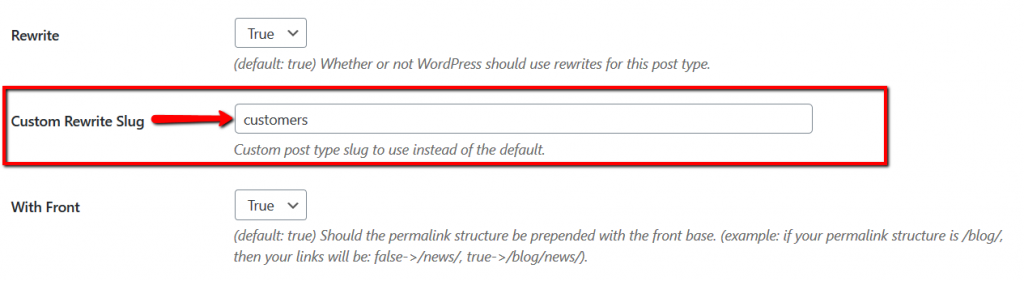
- Last but not least, scroll down to the end of the page and click on
"Save Post Type"button.
Additionally read our guide, How to Remove the Category From URL in WordPress
That’s it for now. We hope this article helped you to change the custom post type slug in WordPress.
Please let us know in the comments if everything worked as expected, your issues, or any questions. If you think this article saved your time & money, please do comment, share, like & subscribe. Thank you in advance 🙂. Keep Smiling! Happy Coding!

You guys have awesome articles. Thanks for another awesome post. It helped me a lot. Keep it up.
Appreciate this post. Will try it out.
Thank you 🙂 We are glad to know that post is useful for you